
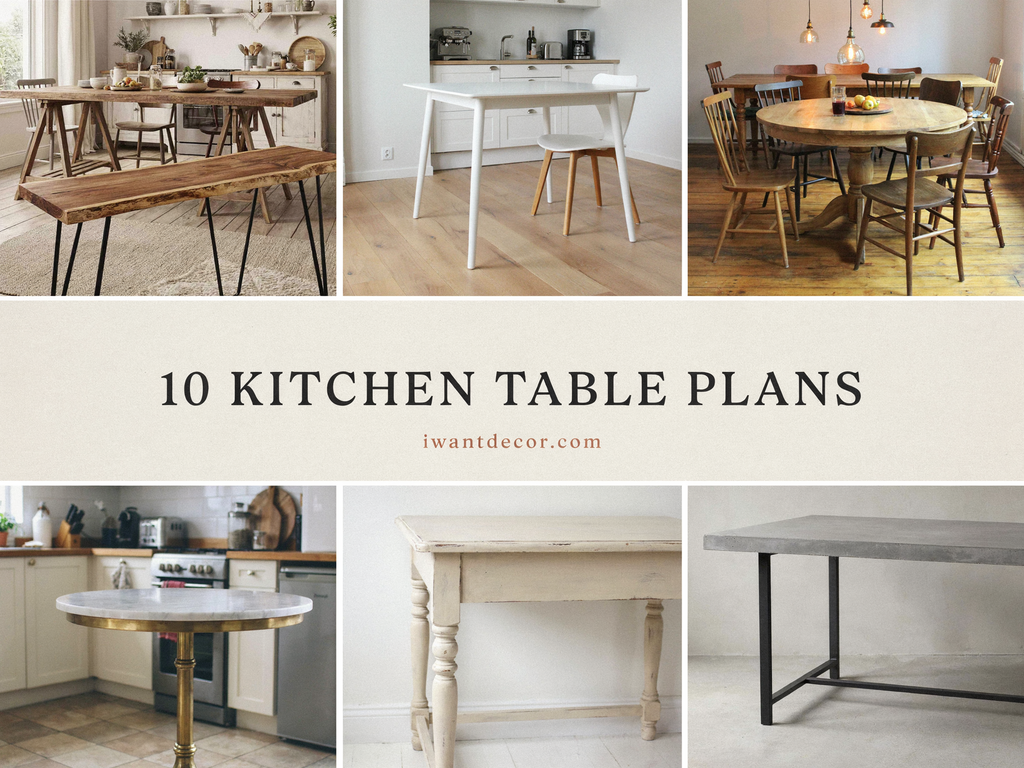
Introduction
As an Amazon associate, we may earn a commission if you make a purchase through these links, at no additional cost to you.
The kitchen table is where real life happens: breakfast, homework, bill paying, and the late-night talks that matter most. It also takes more abuse than any other piece of furniture, which is why so many store-bought tables wobble, chip or peel within a few years.
Building your own solves that. You get solid wood, a size that fits your room exactly, and a finish you can sand and refresh for decades, often for less than a flat-pack table costs.
Below are 10 of the best kitchen table plans online, from a $75 round pedestal table to an heirloom trestle with traditional mortise-and-tenon joinery. Start with the tools list, compare the plans at a glance, then dive into the ones that fit your space and skills.
Recommended tools and supplies
You don’t need a full workshop to build a kitchen table. Most of these plans come together with a handful of basic power tools; the upgrades below make the work faster and more precise. Plan numbers refer to the roundup further down.
The essentials
| Tool | Why you need it | Used in plans | Our pick |
|---|---|---|---|
| Cordless drill/driver | Pilot holes and every screw in the build | All 10 | DEWALT 20V MAX Cordless Drill Driver Set |
| Circular saw | Rip and crosscut boards; a straightedge turns it into a budget miter saw | 1, 3, 6–9 | DEWALT 20V MAX Circular Saw Cordless |
| Pocket-hole jig | Fast, hidden joints for aprons, legs and tabletops | 2, 4, 5, 7, 9 | Kreg Pocket-Hole Jig |
| Bar or pipe clamps | Tight joints and flat tabletop glue-ups | All 10 | Bessey H-Style Pipe Clamps—Incredibly Versatile |
| Speed square and tape measure | Accurate, square layout | All 10 | 7 Inch Carpenter Square |
| Random orbital sander | A smooth, professional-looking finish | All 10 | DEWALT Orbital Sander, 5-Inch Palm Sander |
| Safety glasses and hearing protection | Non-negotiable with any power tool | All 10 | 3M Safety Glasses / NRR 33dB Foam Ear Plugs with Cord |
Worth the upgrade
| Tool | Why you need it | Used in plans | Our pick |
|---|---|---|---|
| Miter saw | Fast, repeatable angle cuts | 2–7, 9 (optional in 8) | DEWALT 12-Inch Miter Saw |
| Jigsaw | Round tabletops and decorative cutouts | 2, 5 | DEWALT 20V MAX XR Jig Saw |
| Table saw | Ripping boards, bevels and mitered edges | 7, 9 (optional in 2, 3, 6, 8) | Towallmark 10 Inch, Multifunctional Table Saw |
| Brad nailer | Trim, molding and quick assembly | 1, 2, 4, 5, 7 | BOSTITCH Brad Nailer Kit |
| Router and straight bit | Rabbets, edge profiles and circle cutting | 2, 8 (optional in both) | 6Pcs Straight Router Bit Set |
| Chisel set | Cleaning up joints; essential for mortise and tenon | 8, 10 | WORKPRO 10-Piece Wood Chisel Set |
Supplies
| Supply | What to look for | Our pick |
|---|---|---|
| Wood glue | Interior wood glue for tabletop glue-ups | Titebond III Ultimate Wood Glue 4 Oz |
| Pocket-hole screws | 1-1/4 in and 2-1/2 in, coarse thread for softwood | 700 PCS Pocket Hole Screws Assortment Kit |
| Wood screws | 2-1/2 in self-tapping star-head screws | 240PCS Wood Screws Assortment Kit |
| Tabletop fasteners | Figure-8 or Z-clips so the top can expand and contract | Table Top Fasteners,20 Pack Z Clips for Table Tops |
| Wood stain | Oil- or water-based; always test on scrap first | Minwax Wood Finish |
| Polyurethane | Durable water-based poly for high-use surfaces | Minwax Fast Drying Polyurethane |
| Sandpaper assortment | 80, 120, 150 and 220 grit | Fandeli | Multi-Purpose Sanding Paper |
The 10 plans at a glance
Eight of the ten plans are free, and the two paid plans cost $5 and $14.99. Skill levels are the designers’ own labels where they give one.
| # | Plan | Style | Size | Skill level | Plan price |
|---|---|---|---|---|---|
| 1 | Farmhouse Table (Ana White) | Farmhouse | Several sizes in plan | Intermediate | Free |
| 2 | DIY Round Table (Shanty 2 Chic) | Round pedestal | Round, base scales up | Intermediate | Free |
| 3 | Round Pedestal Base (Designs by Studio C) | Round pedestal | 40 in round | Beginner | Free |
| 4 | Pedestal Table Base (Abbotts At Home) | Round pedestal | 41–44 in round | Beginner | $5 PDF |
| 5 | Mission Style Table (Ana White community) | Mission trestle | 27.5 × 57.5 in | Intermediate | Free |
| 6 | Tatum Trestle Counter Table (Designs by Studio C) | Counter-height trestle | 30 × 48 in | Beginner | Free |
| 7 | DIY Angled W-Trestle (Jen Woodhouse) | Modern trestle | Full dining size | Intermediate | Free |
| 8 | Modern Floating-Top Table (Woodshop Diaries) | Modern | 40 × 80 in | Intermediate | Free |
| 9 | 2×4 Truss Table (Ana White) | Rustic truss | About 7 ft long | Advanced | Free |
| 10 | Civil War Trestle Table (Wood and Shop) | Heirloom trestle | Full dining size | Advanced | $14.99 PDF |
The plans
1. Farmhouse Table — Ana White
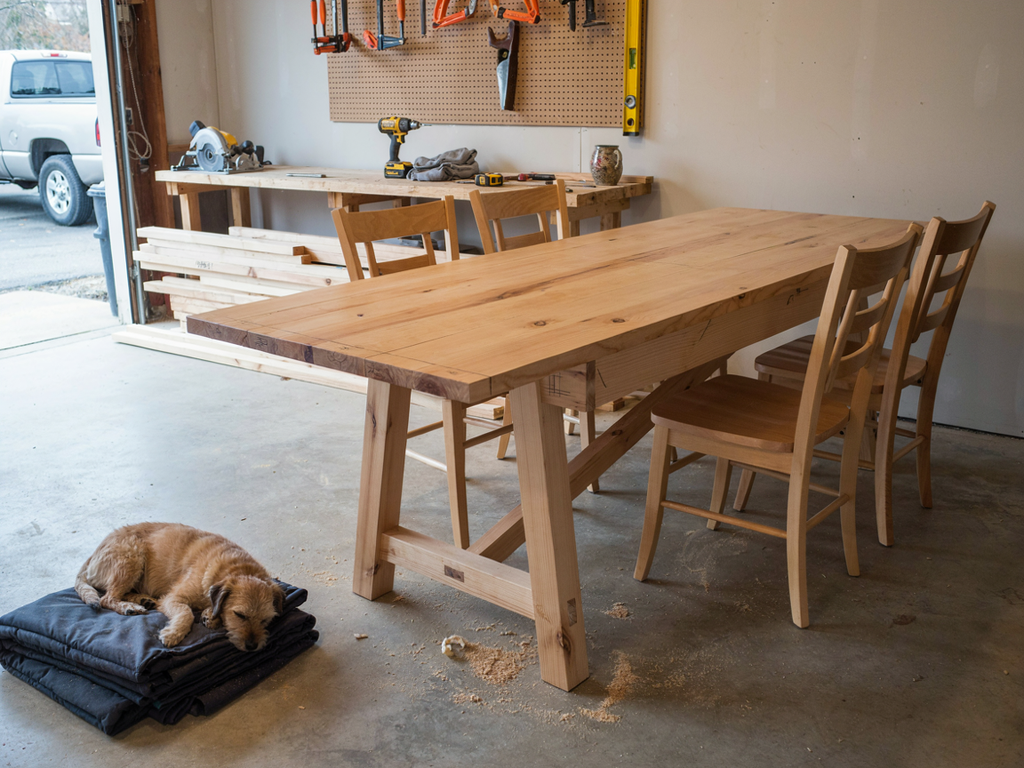
The classic that launched a thousand DIY blogs. Ana White says this plan has been built tens of thousands of times, and builders typically spend $50 to $100 on off-the-shelf 2x4s, 2x6s and 2x2s. It skips pocket holes entirely, so a saw and a drill get you most of the way there.
Tools you’ll need: circular saw, drill, nailer, sander, square, tape measure.
Best for: a first big build with timeless, chunky farmhouse style.
2. DIY Round Table — Shanty 2 Chic
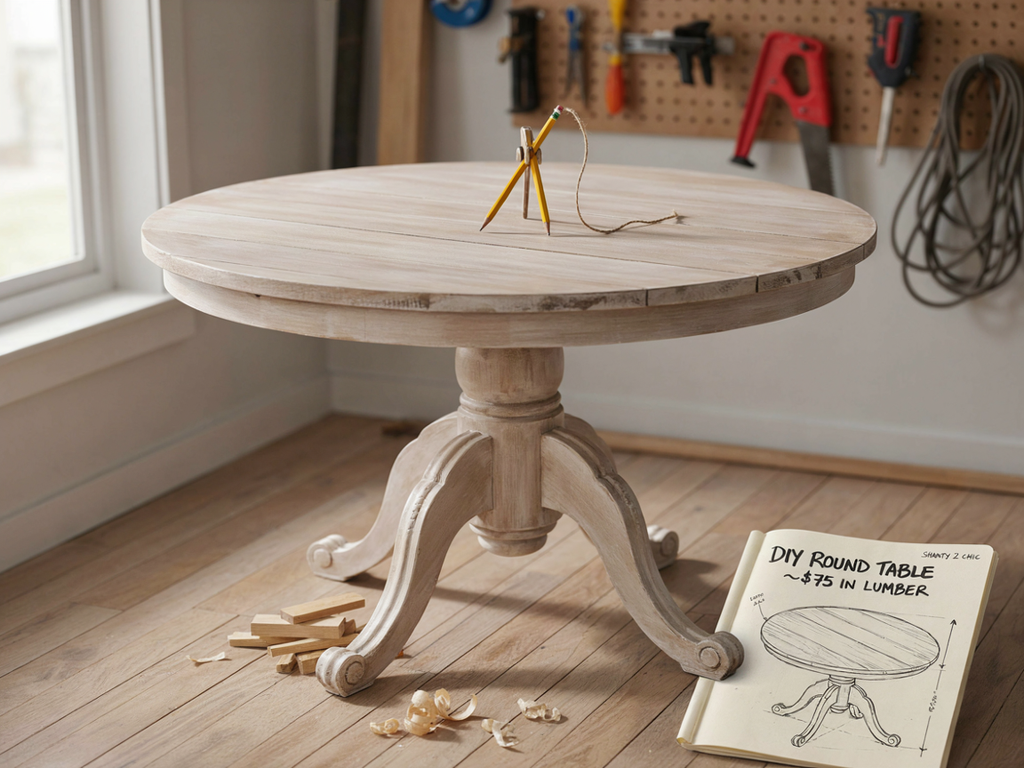
A round pedestal table built for about $75 in lumber. The top is planked 2x boards traced with a simple homemade compass and cut with a jigsaw, while carved corbels give the base a furniture-store finish. Need more seats? The designers say the base handles a bigger top if you lengthen the feet and supports.
Tools you’ll need: jigsaw (or router), miter saw, pocket-hole jig, drill, brad nailer, orbital sander; table saw optional for ripping edges.
Best for: breakfast nooks and bay windows where corners get in the way.
3. Round Pedestal Base — Designs by Studio C
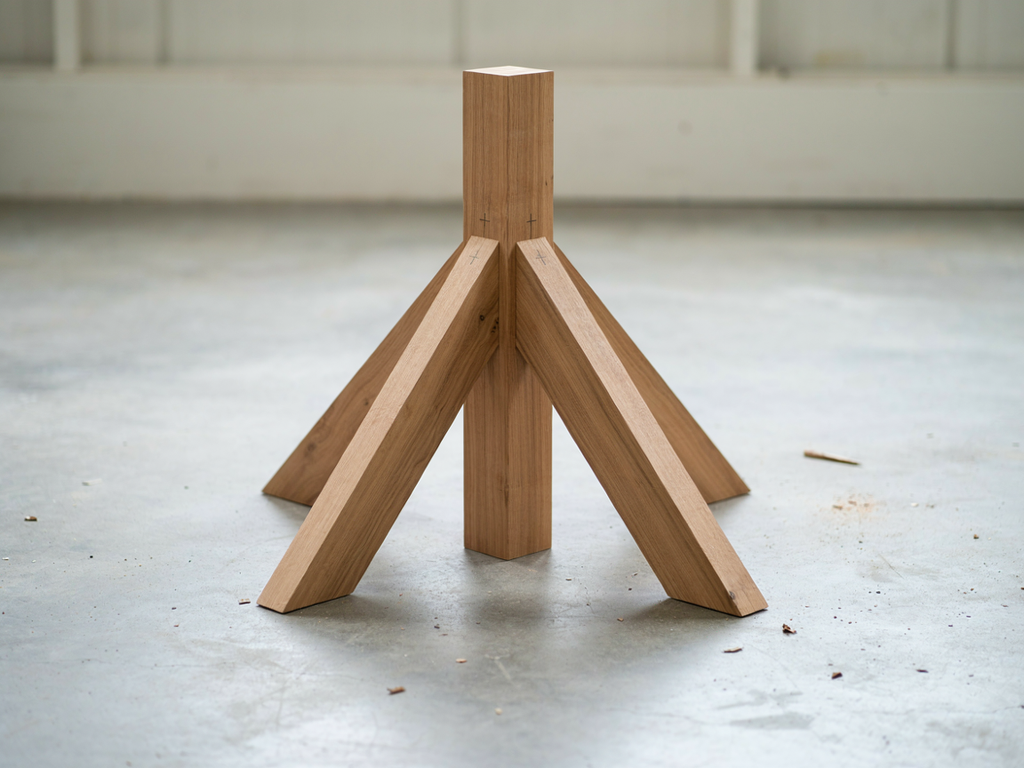
About as simple as a pedestal gets: 2x4s and a single piece of 4×4 post. It is drawn for a 40-inch round top and scales up by lengthening the arms and legs. Pair it with a plywood or planked top and you can finish in an afternoon.
Tools you’ll need: miter or circular saw, drill with countersink bit, sander; table saw optional.
Best for: budget builders who want a round table fast.
4. Pedestal Table Base — Abbotts At Home
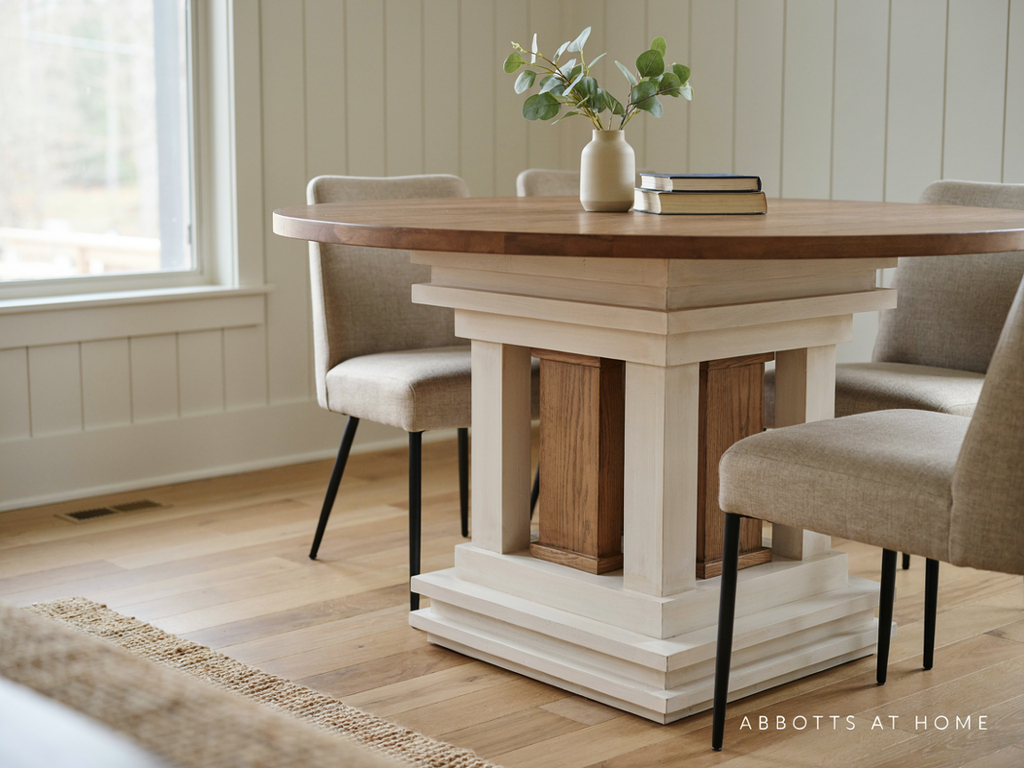
This clever base wraps a store-bought turned pedestal in layers of lumber and crown molding, so it looks custom without any lathe work. The $5, 14-page PDF includes a cut list, 3D drawings and step-by-step instructions. It suits round tops of 41 to 44 inches, or a similar square top.
Tools you’ll need: miter saw, pocket-hole jig, drill, brad nailer, sander, clamps.
Best for: a polished, traditional pedestal with little risk.
5. Mission Style Table — Ana White community plan
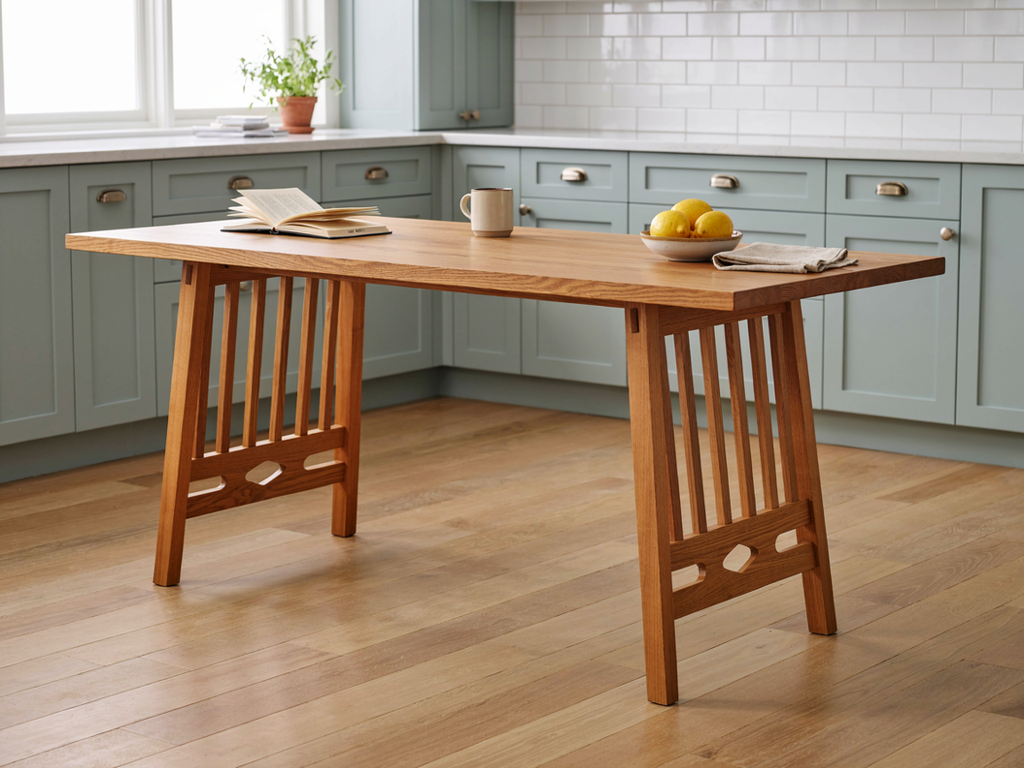
A reader designed this for a tight kitchen, so it is slim: 27.5 inches wide by 57.5 inches long. The trestle ends pair 4×4 legs with slatted panels and cut-out diamonds, and the top is maple plywood edged in 1×2. To resize it, change only the top and the lower rail.
Tools you’ll need: miter saw, jigsaw, pocket-hole jig, drill, brad nailer, power sander, level.
Best for: galley kitchens and small apartments.
6. Tatum Trestle Counter Table — Designs by Studio C

A counter-height table inspired by a Ballard Designs piece, made from 2x4s, 4x4s and two layers of 3/4-inch plywood. The 30 x 48-inch top is edge-banded, and lag screws on the center brace add an industrial touch. The designer pitches it as a one-weekend beginner build.
Tools you’ll need: miter or circular saw, drill, 3/8 in drill bit and socket wrench, iron for edge banding, sander; table saw optional (most home centers will rip the plywood for you).
Best for: open kitchens that want a bar-height gathering spot.
7. DIY Angled W-Trestle Table — Jen Woodhouse
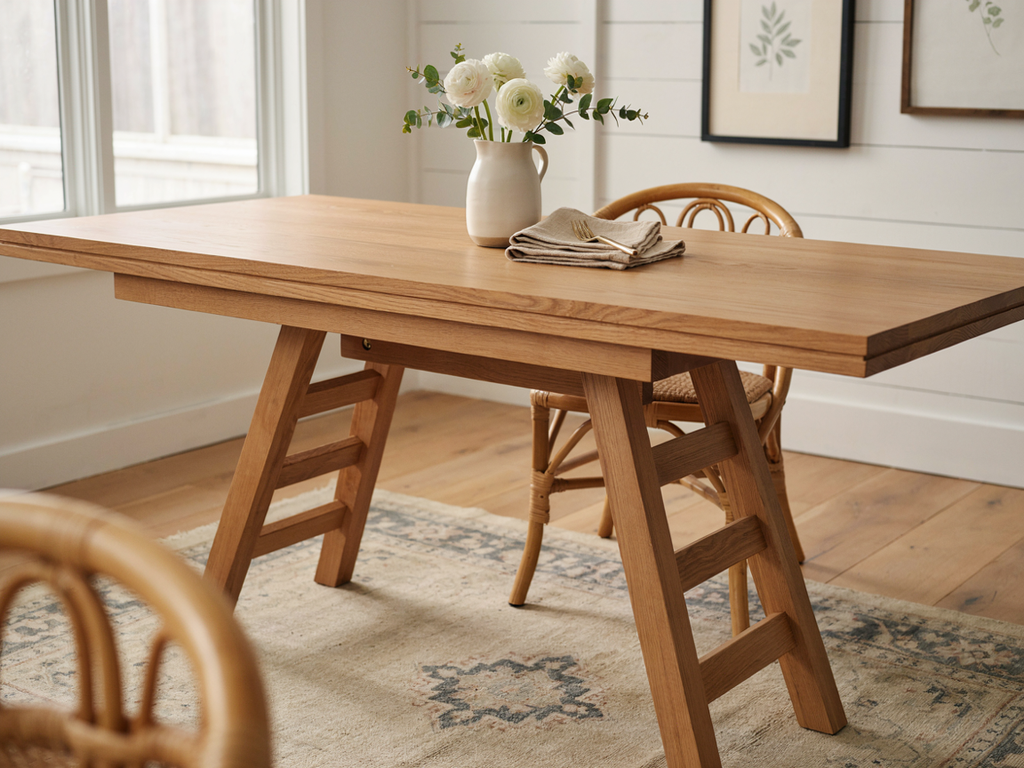
Designed by Jen Woodhouse and built by Anika’s DIY Life, this table pairs angled 2×4 trestle legs with three runners. The top looks like a thick slab but is really 3/4-inch boards wrapped in mitered trim, so no edge grain shows. Anika chose maple for a top that stands up to daily use.
Tools you’ll need: table saw, miter saw, circular saw, drill with countersink bit, pocket-hole jig, brad nailer, bar or pipe clamps, orbital sander.
Best for: a statement table built with mostly basic joinery.
8. Modern Floating-Top Table — Woodshop Diaries
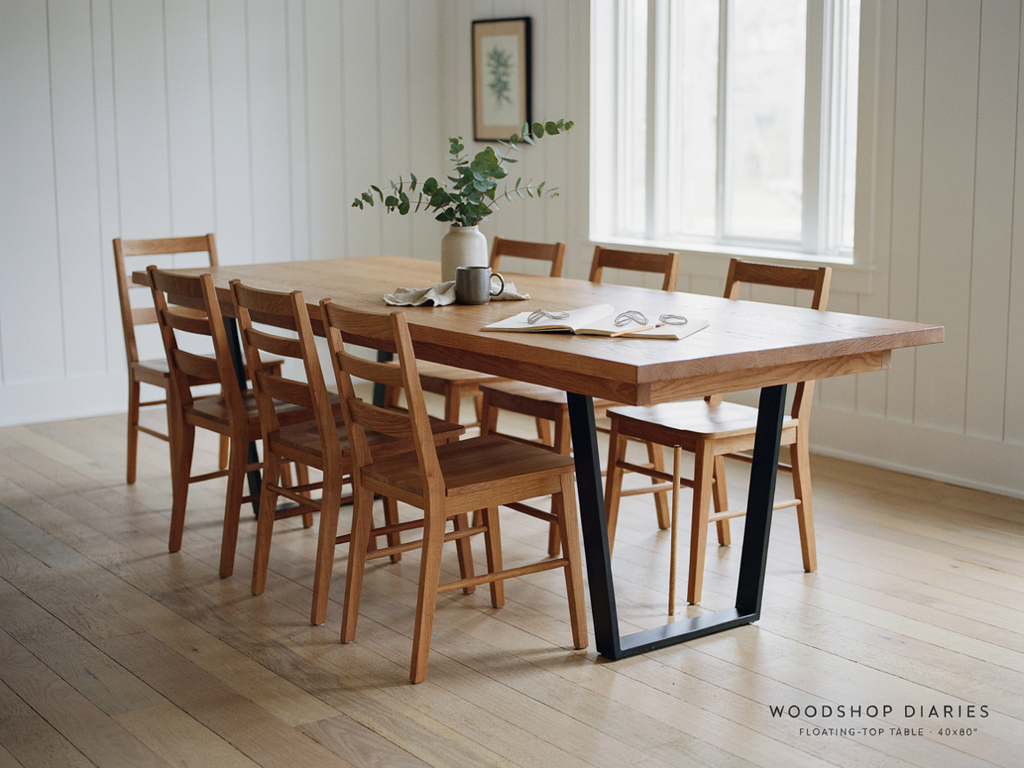
Clean lines, L-shaped legs and a top that sits 1 inch above the apron so it appears to float. Shara built hers 40 x 80 inches, enough for six chairs or eight with ends. It works in 1x or 2x lumber, and figure-8 fasteners let the top move with the seasons.
Tools you’ll need: circular saw, drill, sander, clamps, chisel, 3/8 in and 5/8 in Forstner bits; miter saw, table saw and router optional.
Best for: modern and minimalist kitchens.
9. 2×4 Truss Table — Ana White

A big, rustic table with 2×4 truss legs and a 2×6 top about 83.5 inches long. With no apron, there’s extra legroom for bench seating. Ana rates it advanced because the legs need double-bevel cuts and a table saw.
Tools you’ll need: table saw, compound miter saw, circular saw, pocket-hole jig, drill, power sander.
Best for: big families and bench seating.
10. Civil War Trestle Table — Wood and Shop

Ready to level up? This $14.99 plan teaches traditional mortise-and-tenon joinery across 30 pages of detailed drawings, in both imperial and metric. Heavy timbers make a sturdy table that is rustic yet refined, built to last generations.
Tools you’ll need: chisels and saws for cutting mortises and tenons, plus clamps and a sander; the plan lists the full set.
Best for: an heirloom project and a joinery education.
How to choose the right plan
- Measure first. Standard table height is 30 inches, and widths usually run 36 to 42 inches. Plan on about 24 inches of table edge per person and roughly 36 inches of clearance behind each chair.
- Match the shape to your space. Round pedestals (plans 2–4) suit nooks and tight corners. Narrow tables (plan 5) fit galley kitchens. Long trestles (plans 7–10) need a dedicated dining area.
- Be honest about your skills. New builders should start with plans 1, 3, 4 or 6. Save plans 9 and 10 for when you’re comfortable with bevels and joinery.
- Choose your wood. Pine and fir are affordable and easy to work but dent easily, which gives that lived-in farmhouse look. Maple or oak costs more and holds up better to daily use.
- Let lumber acclimate. Store boards indoors for a few days before cutting to reduce warping.
- Finish both sides. Use a durable polyurethane on the top, and seal the underside too so the top doesn’t cup.
Ready to build?
Pick the plan that fits your room and your skills, gather your tools, and block out a weekend. A table you built yourself will host years of dinners, homework and conversations, and when life leaves its mark, you can simply sand and refinish it. Share your build with us; we’d love to feature it.